使用Azure Pipelines来实现Teams App的CI
我在之前的文章里介绍了如何一步步配置CI/CD来部署Teams App( 之前的文章 ),随着Azure DevOps的发展,微软推出了Azure Pipelines。在这篇文章中,主要介绍什么是Azure Pipelines,以及如何使用Azure Pipelines来进行Teams App的构建、测试和部署工作负载
什么是Azure Pipelines
微软发布了Azure Pipelines,他们新的 CI/CD 服务,是 Azure DevOps 产品的一部分。Azure Pipelines 可用于构建、测试和部署工作负载,并可以让各种语言、项目类型和平台协同工作。
作为 Visual Studio Team Services(VSTS)的后续产品,Azure DevOps 由几个组件组成,Azure Boards、Azure Repos、Azure Test Plans、Azure Artifacts和 Azure Pipelines。Azure DevOps 提供了端到端服务,用于共享代码、跟踪工作并提供类似于其他服务(如Atlassian Stack)的解决方案。 这些组件都是 Azure DevOps 链中的一个链接,Azure Pipelines 实现了 CI/CD 管道的角色。 此外,Azure Pipelines 具有以前在 VSTS 中可用的所有功能,并补充了一些新功能:
- Azure Pipelines 是一项独立服务,可以独立于其他 Azure DevOps 组件使用。
- 可以直接通过 GitHub Marketplace 获取和配置新的管道。
- 更好地与 GitHub 集成,包括拉取请求的构建和跟踪代码提交及其相关问题。
- 通过容器作业来支持原生容器。
- 开源项目可以免费使用 Azure Pipelines。
- 相比 VSTS,Azure Pipelines 提供了更加灵活的免费使用限制。
如何利用Azure Pipelines来构建Build
之前的文章中,提到如何利用Azure DevOps来Build、Deploy应用到Azure上,实现CI/CD的整个部署过程,简单回顾下配置的步骤:
1、在Azure DevOps中新建Repo, 本地Clone,Push代码
2、在Azure DevOps中并编译生成一个 .NET Core应用, 配置持续集成环境
3、将Azure添加到Azure DevOps的Service Endpoint(仅限中国区的Azure)
4、在Azure中创建App Service
5、配置Azure DevOps中构建的应用Release到Azure App Service
下面,一步步的演示,如何使用Azure Pipelines构建一个新的Build,其中一个文件azure-pipelines.yml,是整个Azure Pipelines服务的关键,
我们将逐个分析整个yml配置的含义
一、配置build pipelines
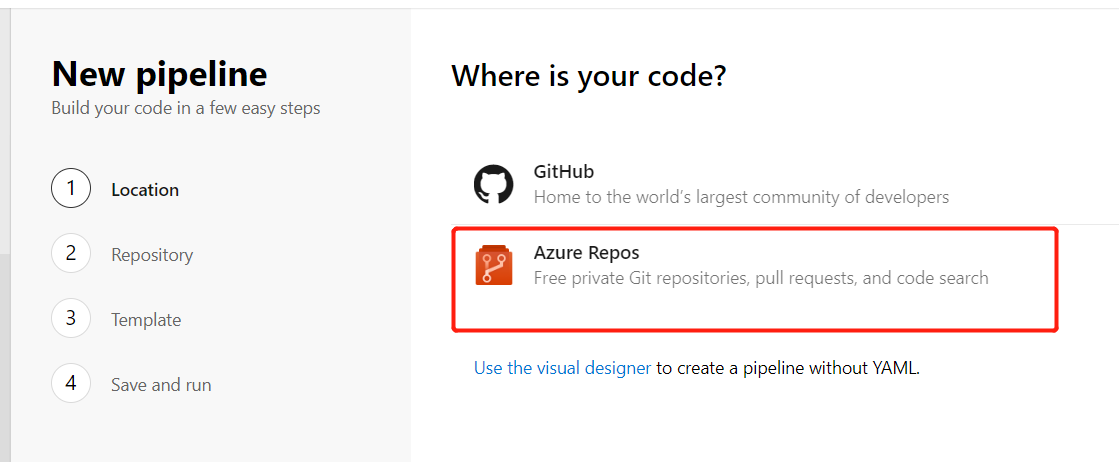
1、进入到Azure Devops, 看到整个的功能模块导航,和之前已经有很大的变化,这里我们略过新建Repos,Check in代码的过程, 找到 “Pipelines”,点击 “Build”,新建New build pipelines

2、这里“Location” 选择 “Azure Repos”
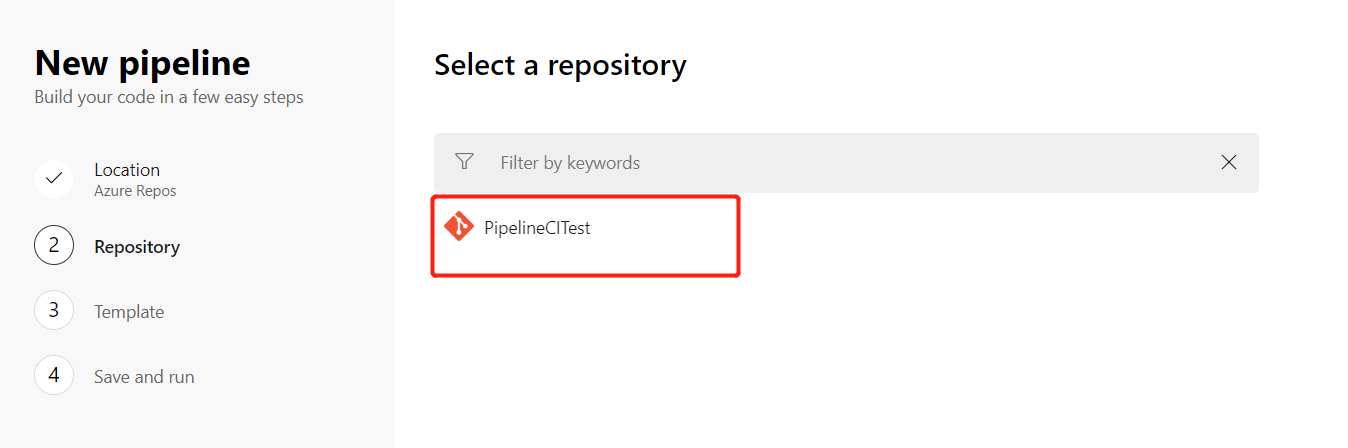
3、选择项目代码的Repos
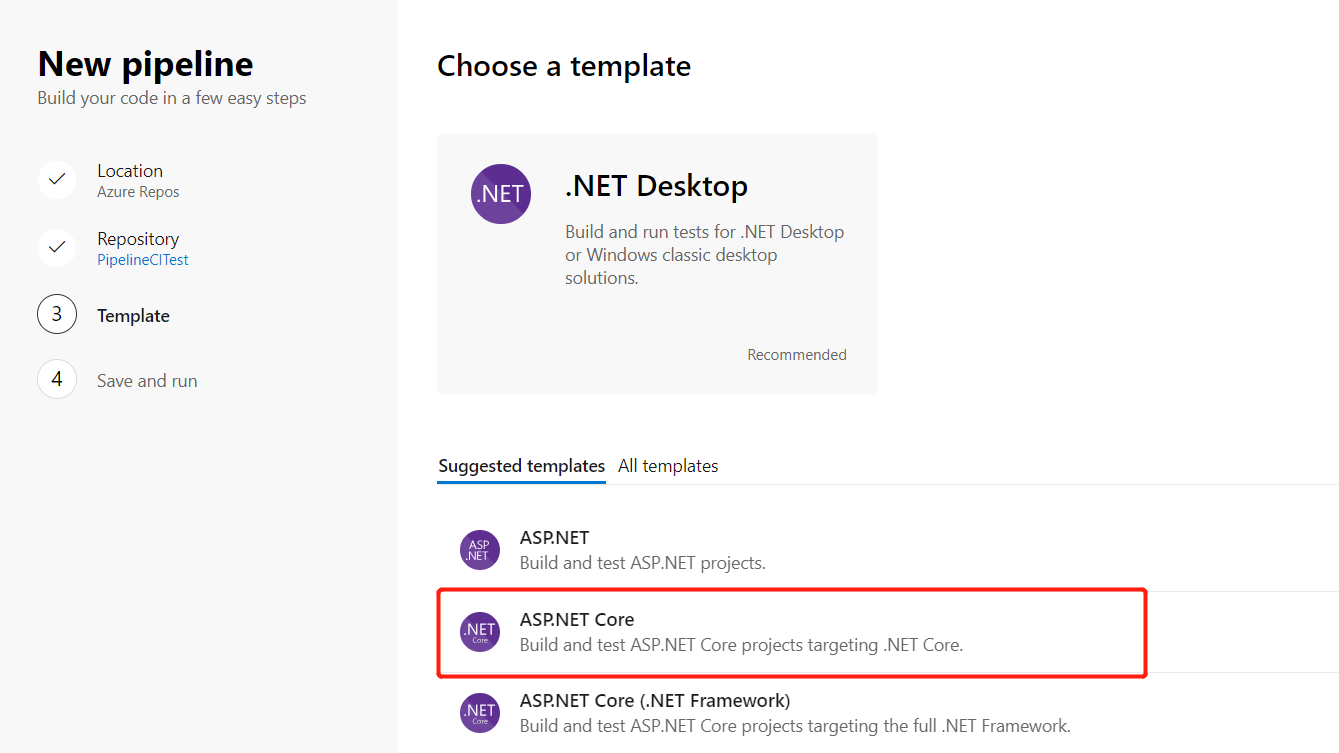
4、Build的配置模板,选择“ASP.NET Core”,
5、配置完成,开始整个Build的过程
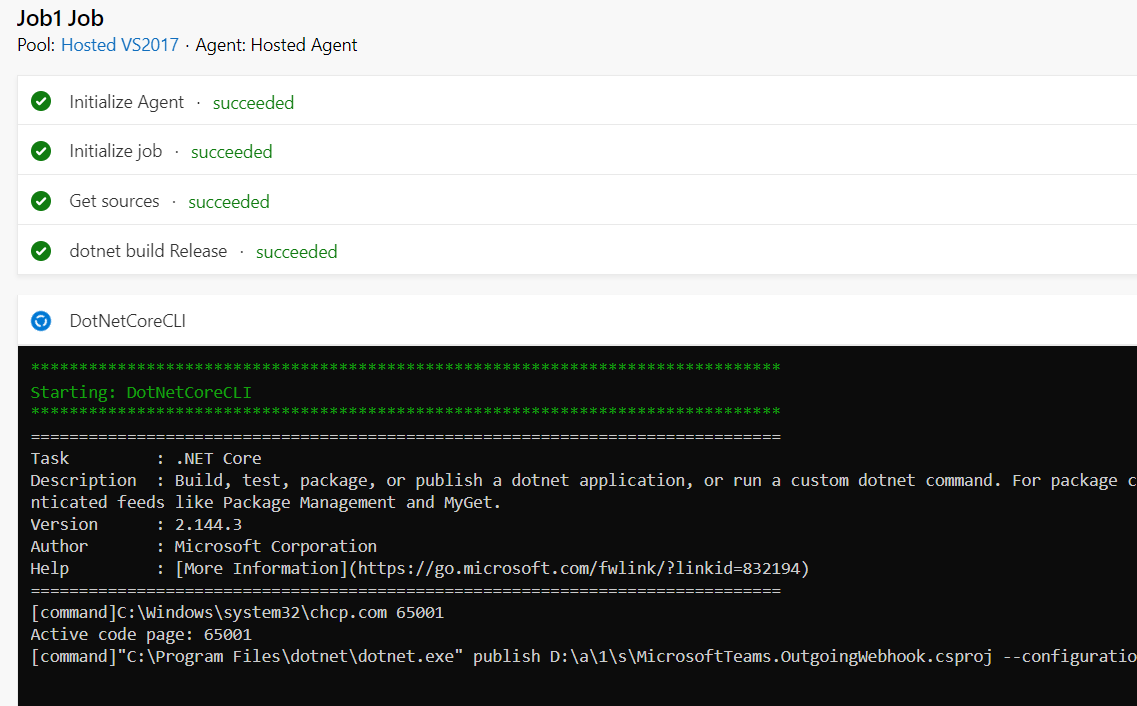
到此整个自动化Build的过程就已经配置好了,和之前最大的一个不同是,回到Code Repos, 看到在我们的项目代码中,自动生成了一个名为azure-pipelines.yml文件
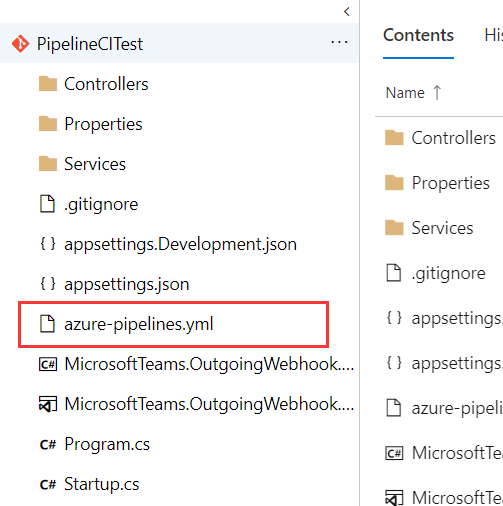
打开这个yml文件,看下里面的配置参数
pool:
  vmImage: 'vs2017-win2016'

variables:
  buildConfiguration: 'Release'

steps:
- script: dotnet build --configuration $(buildConfiguration)
  displayName: 'dotnet build $(buildConfiguration)'

- task: DotNetCoreCLI@2
  inputs:
    command: publish
    publishWebProjects: False
    projects: 'MicrosoftTeams.OutgoingWebhook.csproj'
    arguments: '--configuration $(BuildConfiguration) --output $(Build.ArtifactStagingDirectory)'
    zipAfterPublish: True
二、Azure Pipelines中yml文件释义
1、首先,pool vmImage参数
pool:
  vmImage: 'vs2017-win2016'
这里的pool vmImage参数表示:Build Environment, 其中的可选项有 ‘ubuntu-16.04’、’macOS-10.13’、’vs2017-win2016’,在Microsoft-hosted agents中有不同
的系统环境及其版本供选择
2、variables
  variables:
  buildConfiguration: 'Release'
这里的buildConfiguration参数表示: Build的版本是Release版本
3、steps
steps:
- script: dotnet build --configuration $(buildConfiguration)
  displayName: 'dotnet build $(buildConfiguration)'
这里的script: dotnet build表示:执行build的工作脚本,命令,并且进行build的输出配置,或者使用.NET Core task的模式进行配置,如下:
steps:
- task: DotNetCoreCLI@2
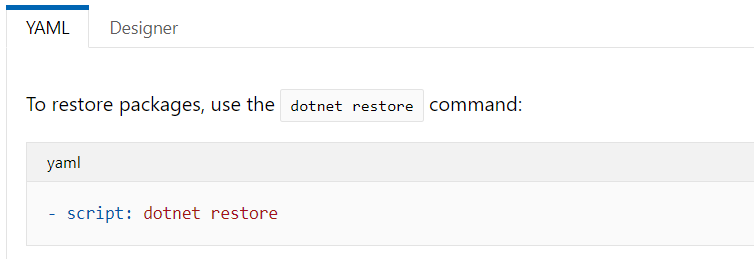
inputs:
command: restore
projects: '**/*.csproj'
feedsToUse: config
nugetConfigPath: NuGet.config # Relative to root of the repository
externalFeedCredentials: <Name of the NuGet service connection>
在restore之前,如果我们想要在Microsoft-hosted agent指定 .Net Core SDK的版本进行Build,可以在yml配置中加入如下配置
```yml
- task: DotNetCoreInstaller@0
  inputs:
    version: '2.1.300' # replace this value with the version that you need for your project
4、task
- task: DotNetCoreCLI@2
  inputs:
    command: publish
    publishWebProjects: False
    projects: 'MicrosoftTeams.OutgoingWebhook.csproj'
    arguments: '--configuration $(BuildConfiguration) --output $(Build.ArtifactStagingDirectory)'
    zipAfterPublish: True
其中task表示:使用.NET Core task的进行模式执行任务构建, command则别是构建的执行的命令,比如常用的build、test、publish等
三、总结
从上面的yaml的脚本配置,结合微软的官方文档, 如下截图:
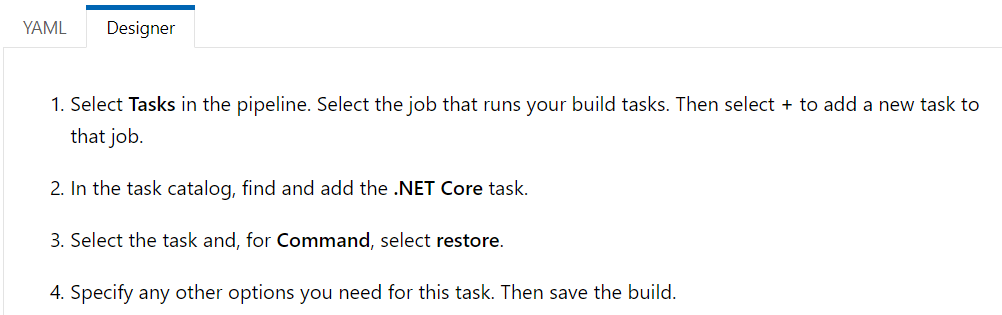
我们可以这样去理解,相当于以前从可视化的界面进行CI的配置(截图中的Designer模式),现在在Azure Pipelines中使用yaml文件进行配置(截图中的YAML模式),这进一步方便了对CI过程的配置,当我们需要改变 我们的CI行为,比如增减组建,步骤等,直接修改配置文件,当push代码,merge到分支后,则整个构建流程会按照新的配置文件进行构建,这无疑提供了更大的灵活性。